The Value of Having a Professional Website for Your Business

WEBSITE DESIGN: The Importance of Having a Professional Website for Your Business

In days gone by, when a customer wanted to search for a specific service provider, they would use the Yellow Pages of the phone book to locate and contact the desired business. Those days are now gone.

Today, when a consumer searches for your services, where do most turn? The internet! Having a professional online presence has never been more important!  How does your internet presence match up to your competition?

Is your website easy to find on Google?

The typical website has between 5 and 6 pages: Home, About Us, Our Services, Contact Us, and maybe even a Coupons page. This is not enough to get you to rise above your local competition in the rankings, as potential customers type in many different keywords that are relative to what you do.

We recommend a different approach. We recommend that each page on your website be optimized using two to three keywords. Also, you should be advised that there are literally hundreds of different keyword combinations in each geographic area that a user might type in if they are looking for your services.

So, what you should do is have a page built out for each one of your services. For example, if you are in the landscape industry, you don’t just offer landscaping services; you offer landscaping, hardscaping, fertilization, irrigation systems, mowing, commercial snow removal, and the list goes on. We think it’s important to make sure these keywords/pages are on your website.

Your website should be optimized for the sub-cities in your geographic area, typically between 10-15 sub-cities for most markets. You should have pages built that combine geographic terms with the terms in the above paragraph to make sure that you at least have the indexation in Google (meta titles, descriptions, and anchor text is updated).

Does your website appear in the first page of search results?

Steps 1 and 2 are ONLY 25% of the battle. The other 75% of the battle is getting inbound links (your internet popularity) to the home page and to the sub-pages on your website.

Once your website has been optimized, the only thing that will get you to rise in the search engines is quality in-bound links (links from other sites pointing to your website). You need to  implement a proactive strategy to obtain inbound links. As part of our link building strategy we:

  • Create and distribute quality content (articles, blog posts, etc.) on your behalf.
  • Do competitive link acquisition, which is the strategy of link building and getting your site to rise in the search engines. We are going to proactively look into the top 5 competing landscape industry contractors in your market and determine who (which companies/websites) are linking to them and how many links they have. Then, we reverse engineer your competition’s Internet marketing strategy and outperform them.
  • Blog commenting (posting insightful comments and feedback on industry specific blogs).

LINK BUILDING is the single-most important activity in search engine optimization/placement.

Next, we will cover citation development. Your local directory listings need to be proactively claimed: Google Places, Yahoo, Bing, City Search, Angie’s list, Best of the Web and other very important local online directories. You need to have your listings built out (uploading photos, videos, special offers, etc.) and optimize them for top placement.

Does your website appear in Google Maps?


Showing up on Google Places with a Google Map is the #1 ROI for your Internet marketing strategy. It is not easy. By adding your business to all of these different directories, you are going to improve your exposure and you might even get some free calls out of it. More importantly, you need to build your citations and credibility, which is going to improve the probability of getting you on Google Maps/Google Places.

In using the example of a landscape business again, consistently putting out valuable information on how to select a landscape contractor, along with other relative content like, “5 ways landscaping can improve the value of your home”, “Edging a lawn is easy to do. Here’s how.”, “These 4 flowers are great at attracting honeybees”, “How often should I mow my lawn?” By publishing this content on your website specific to your business and geography, you are building your internet presence and credibility.

We specialize in providing website design and digital marketing services that get results. When you are ready for professional assistance, please contact us for a FREE consultation.

How To Create Facebook Cover & Profile Graphics with Photoshop

HOW TO CREATE FACEBOOK COVER AND PROFILE GRAPHICS FOR YOUR BUSINESS PAGE

In this tutorial, we will show you how to create Facebook cover and profile graphics, by using Adobe Photoshop. Since we are a website design + digital marketing agency, we have Photoshop available to us as one of the tools we use each day. (We do not receive any payment for recommending this software.) The program is very precise and allows you to create graphics that fit well in the Facebook cover photo and profile graphics space. At the time of this video, Photoshop has a FREE 7 day trial, so if you don’t yet have it, you can try it for free. I’ll include the link here. You can pause this tutorial and go get it now.

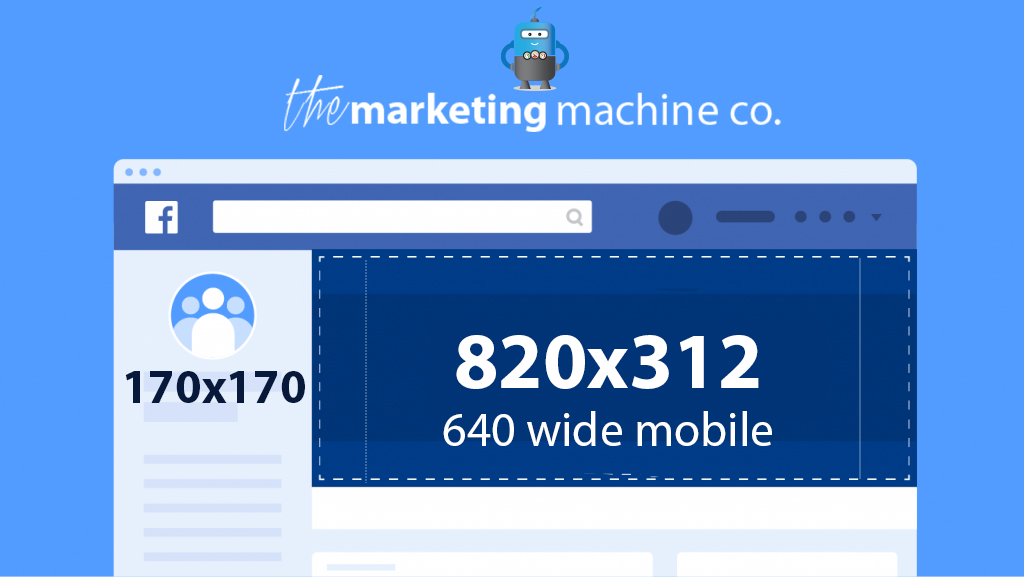
Once you have photoshop installed, you’re going to want to research what the current dimensions are for the Facebook cover photo and profile image. These are often changing. You can do this by searching the web for “Facebook cover photo size”. The dimensions as of the writing of this post are as follows:

     820 pixels (wide) by 312 pixels (tall) for desktop computer
     640 pixels (wide) by 360 pixels (tall) for mobile

And then we need to search for current Facebook profile photo size. You can do this by searching the web for “Facebook profile photo size”

     170×170 pixels is the current size

Okay, so now we are ready to move into the step by step of how to build our Facebook Cover Graphic.

STEP BY STEP TUTORIAL

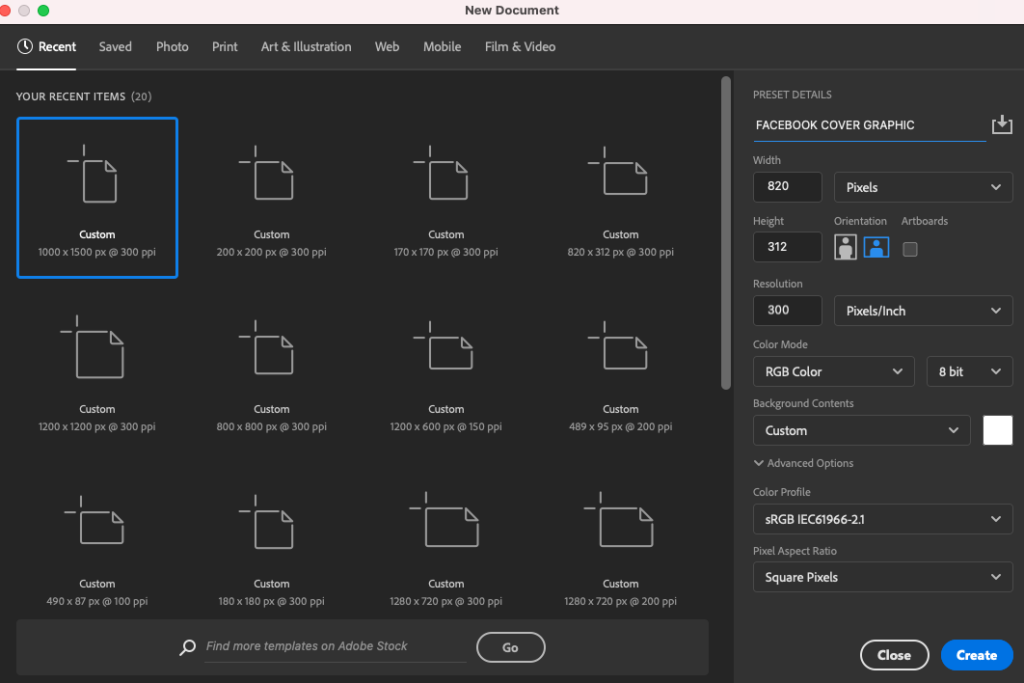
1. Open Photoshop and select NEW. Then enter the dimensions for the cover graphic (820 x 312 pixels). The resolution should be 300 dpi. This will allow for a nice crisp graphic in our final output. This will create our artboard to the appropriate size. Click CREATE.

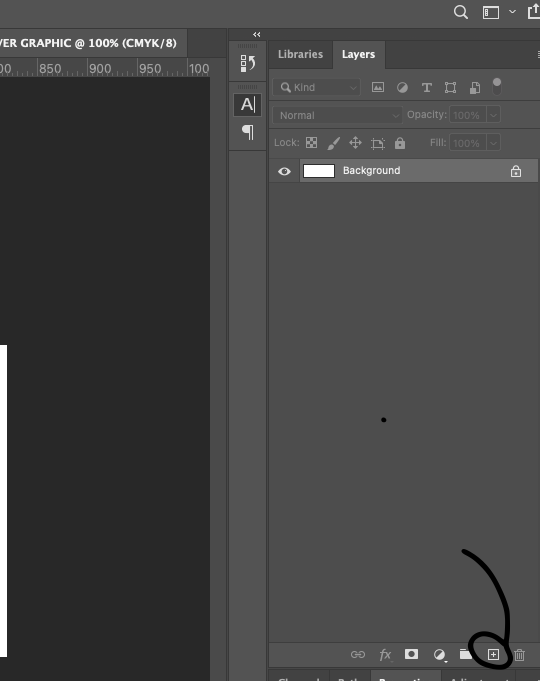
2. Add a NEW LAYER to our piece by clicking the + icon on the right LAYERS panel.

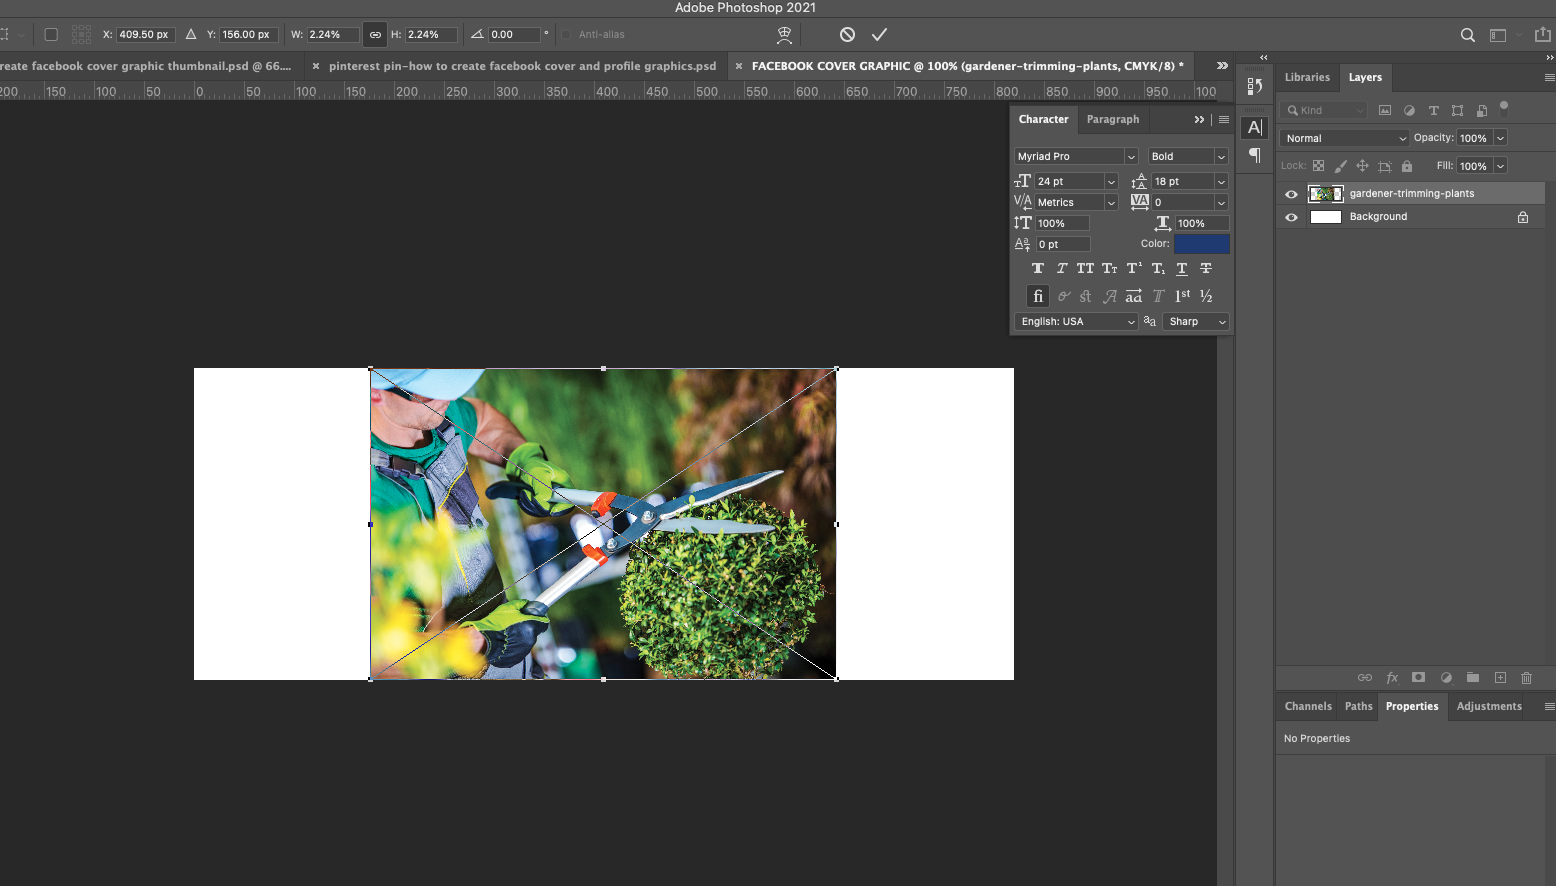
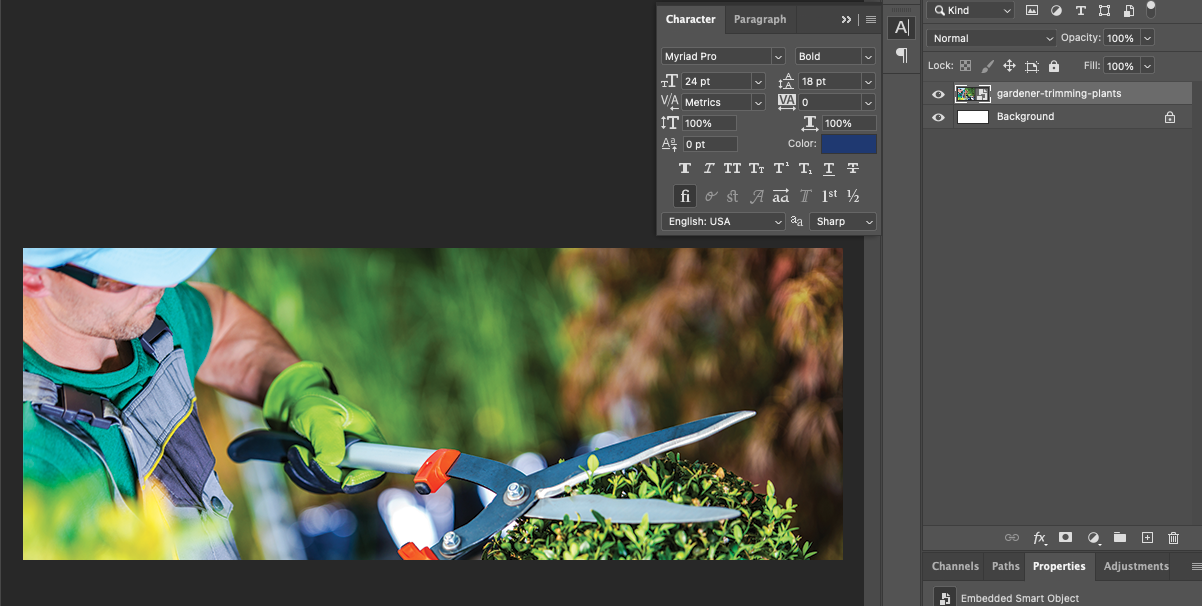
3. Once you have your NEW LAYER, you are ready to add the image you want to use for the cover photo. We typically recommend including people in the image whenever possible to get the best results, since people typically like to see pictures of people. You might consider a photo of your people at work, a photo of your team, the owner etc. Just DRAG AND DROP the photo onto the artboard.

4. RESIZE the image to fit the artboard using the corner handles.

5. Click the CHECKMARK in the top navigation to set the image in place.

6. Add a TEXT BOX by selecting the T icon in the left tool panel. You can overlay text on your photo to give your followers/visitors more information about your business. We typically recommend listing services here so that folks can know what services you offer at a glance. Draw the text box and type in the text.


7. To PLACE the text, select the checkmark in the top toolbar.

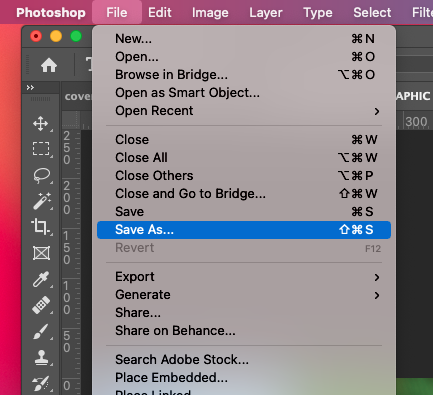
8. SAVE the graphic so that it can later be imported into Facebook. Go to FILE>SAVE AS.

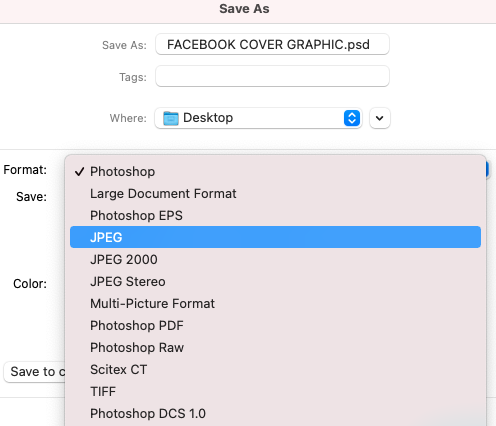
9. SAVE AS>JPEG.

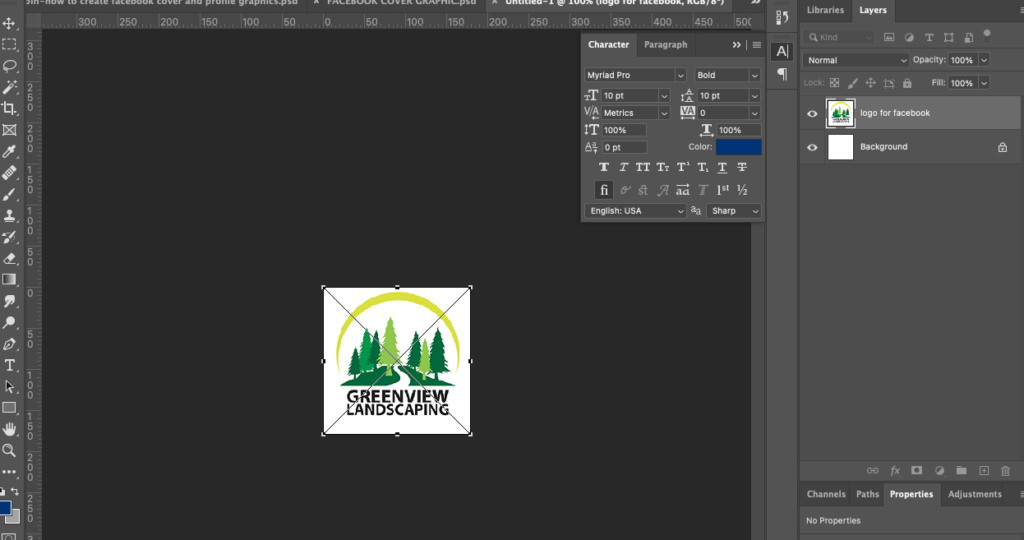
10. To create the graphic for the profile image, repeat the steps above, except this time the size should be 180 x 180 pixels, at 300 resolution. We typically recommend the logo be used as the profile graphic because it will be spread across the web and attached to any comments or posts and help to continue to build your brand recognition.

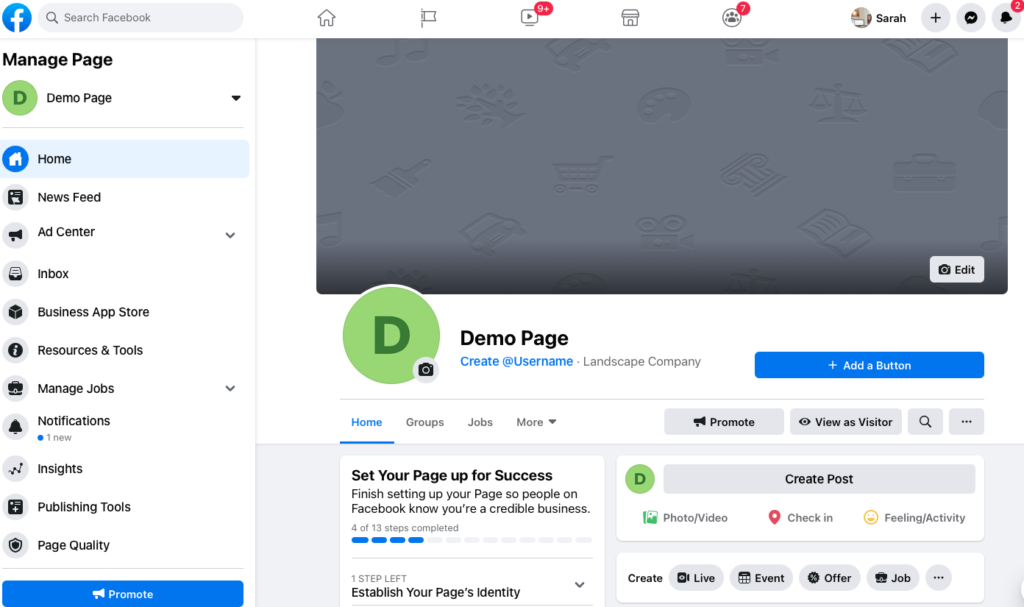
11. Once you have saved both the COVER GRAPHIC and PROFILE GRAPHIC, you are ready to import them into Facebook. Login to Facebook and navigate to your business page to begin. We will use our infamous Demo Page for this purpose.

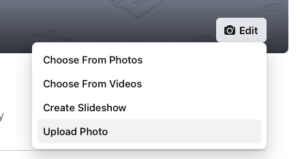
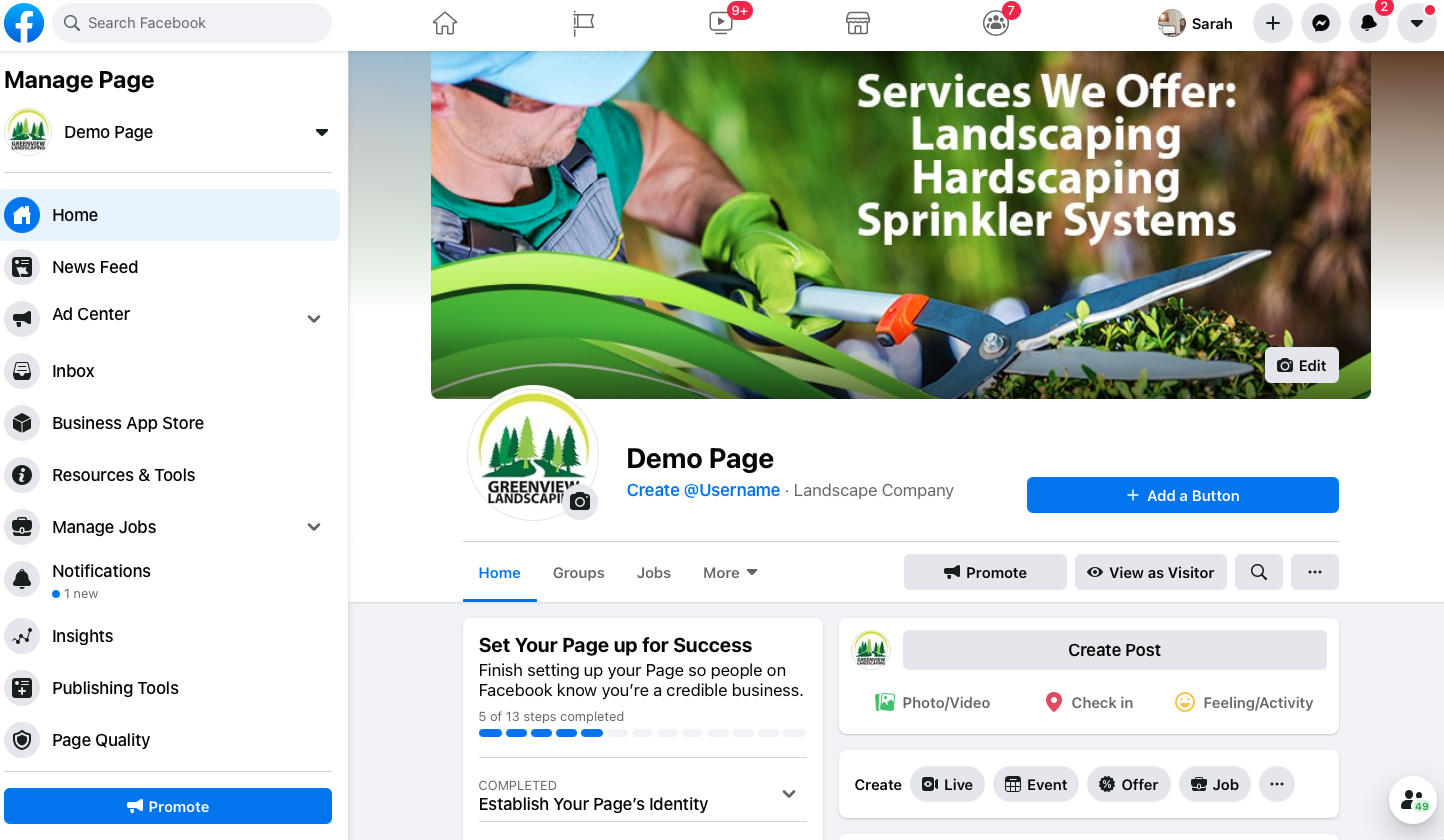
12. Let’s upload the COVER graphic first. To do so, click on the CAMERA ICON with the word EDIT next to it.

Select UPLOAD PHOTO.

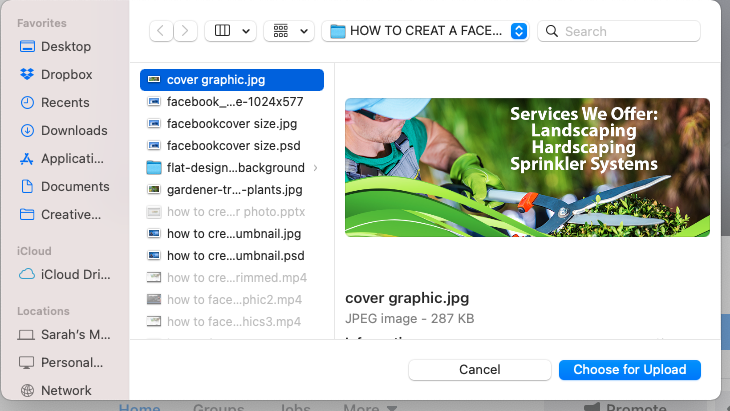
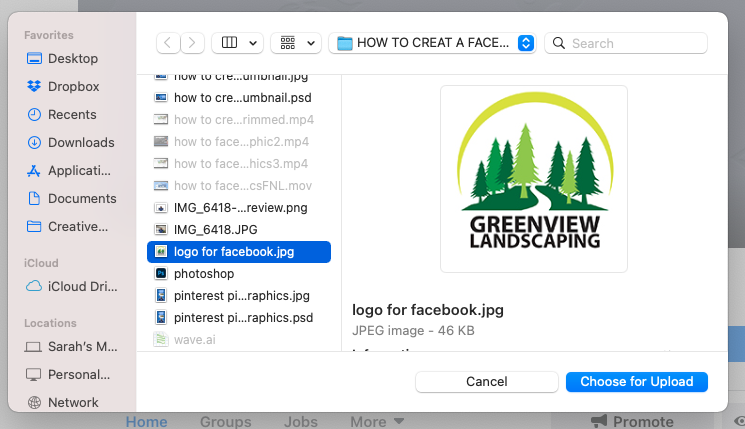
13. Navigate to the place on your computer where you saved the graphic. Select the graphic and click the blue CHOOSE FOR UPLOAD button.

14. Reposition the image if needed. Then click SAVE CHANGES.

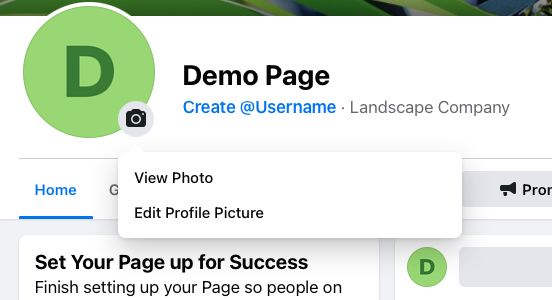
15. Now we need to upload the profile graphic. To do this, click on the CAMERA ICON next to where the profile graphic goes.

16. Then choose EDIT PROFILE PICTURE.

17. Navigate to where the graphic was saved on your computer. Select the graphic and click CHOOSE FOR UPLOAD.>SAVE.

18. We recommend that you TEST your page both on a desktop computer and your mobile device to make sure that it appears as you intended.

And there you have it! You now have a professional Facebook Business page with graphics that align with your brand. Congratulations!

How To Schedule A Facebook Post

HOW TO SCHEDULE A FACEBOOK POST


In today’s tutorial, I’m going to show you how to schedule a Facebook post for your business page. This comes in handy if your business is wanting to create a group of posts at once and get them into the Facebook system. This tool can be helpful so that you can streamline your processes and create posts say for a week or even the month at one time, schedule them out on Facebook, and then use your time to prioritize other tasks you need to get done. This is what we do for the clients that we serve in the area of social media.

Let’s dive into the tutorial. But before we do, please take a few moments to subscribe to our channel by clicking the bell icon in the upper right-hand corner of your screen so you’ll be notified when we post videos.

STEP BY STEP TUTORIAL: HOW TO SCHEDULE POSTS ON YOUR FACEBOOK BUSINESS PAGE.

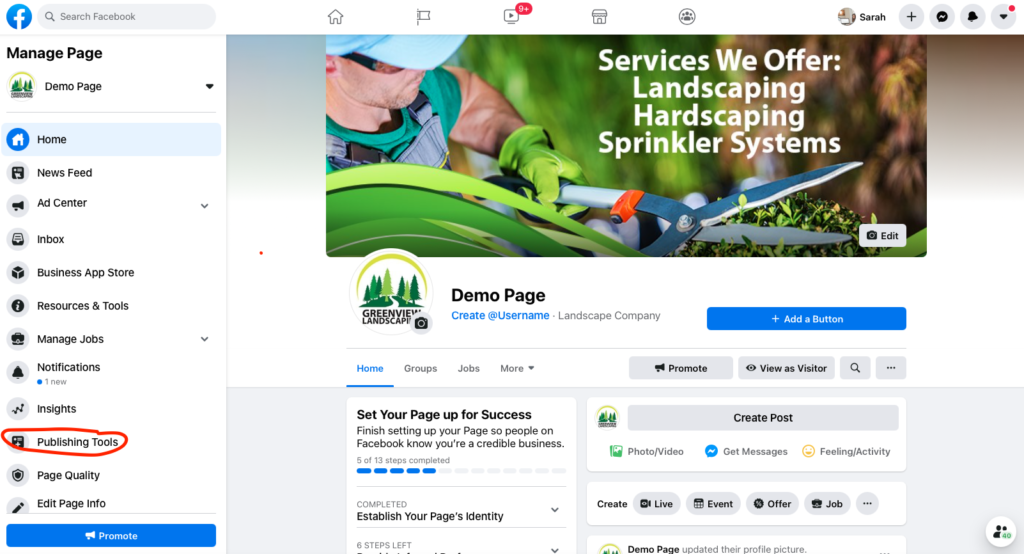
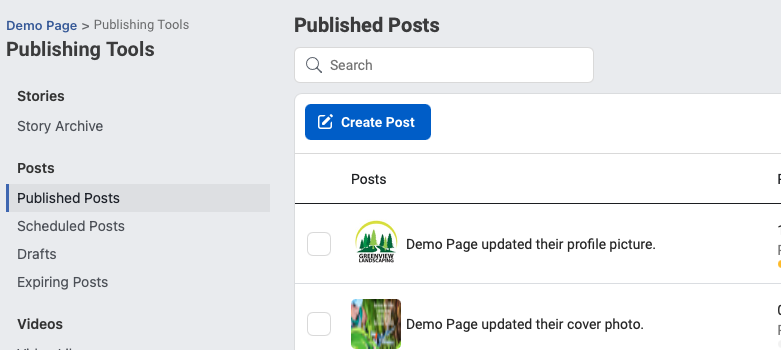
1. Okay, so the first step is to open up your Facebook business page. And then click the PUBLISHING TOOLS link in the left navigation. This is the area that is going to allow you to schedule posts into the future and have them posted at the desired time.

2. Next, click the blue CREATE POST button.


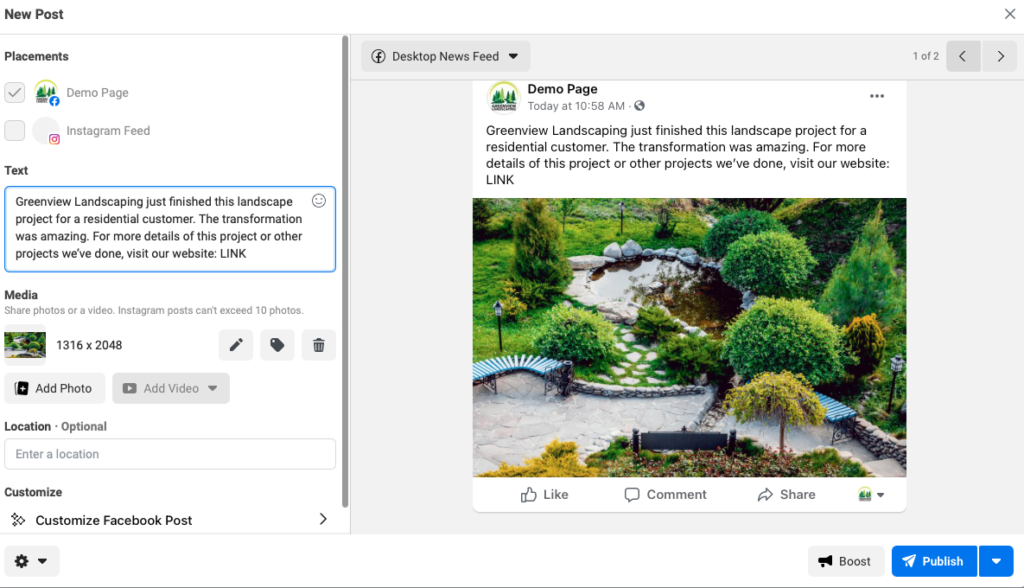
3. Add a photo by uploading it from your computer or mobile device. Choose the ADD PHOTO button. Videos can also be added.

4. Add any TEXT you want to appear with the post and a LINK to your website or blog post.

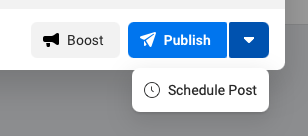
5. Now you are ready to SCHEDULE the post for the future. To do this, click the blue DROP DOWN ARROW next to the PUBLISH button. And click SCHEDULE POST.


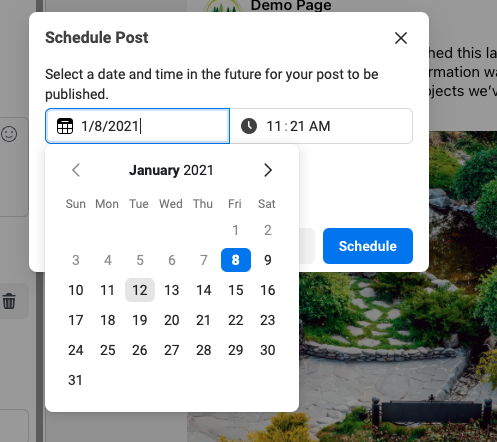
6. This opens up a calendar for you to choose the date and time you’d like the post to appear on Facebook. Select the desired DATE and TIME.

7. Click the blue SCHEDULE button on the open window.

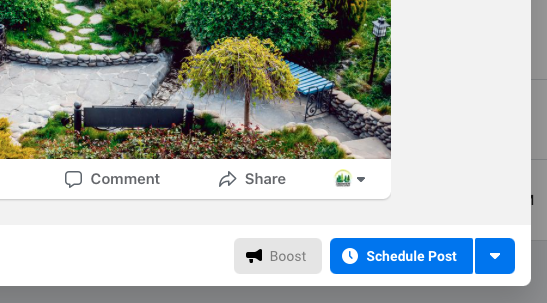
8. The last step is to click the SCHEDULE POST button.

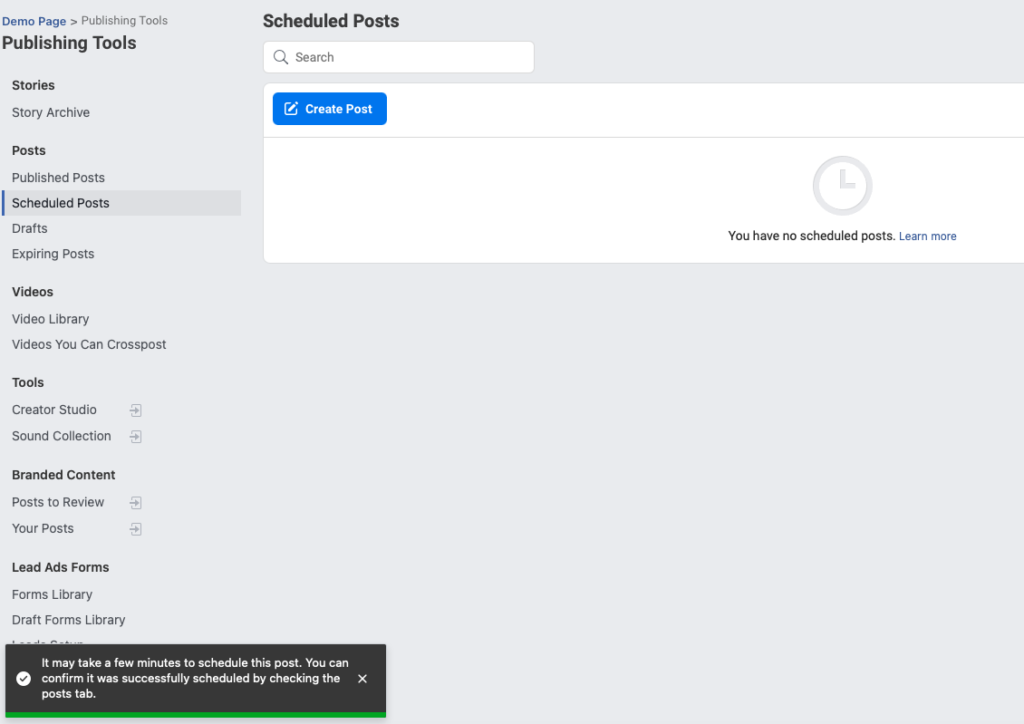
9. You should then receive a message indicating that your post is being scheduled. After a few moments, your post will appear in your SCHEDULED POSTS dashboard. You might need to refresh your page for this to appear.

That’s it! You’ve successfully scheduled your post. We trust that this tutorial has been helpful to you. If we can be of assistance with website design or digital marketing, please contact us.

How to Create a Facebook Business Page

HOW TO CREATE A FACEBOOK BUSINESS PAGE FOR YOUR BUSINESS

In this step-by-step guide we show you how to create a Facebook business page.

In this video we make the assumption that you already have a personal Facebook user account. And the posts that we refer to are organic (unpaid) posts, not Facebook ads. 

We trust this tutorial will help you get a good start to your Facebook business presence. 


We specialize in website design and digital marketing for businesses and are available to assist you with professional setup of your Facebook business page if you desire. 

error: Content is protected !!